A turtle’s shell is an important part of its body, and because of that, proper care should be observed in order to keep your pet turtle healthy and happy. A good pet owner should understand how to care for the turtle’s shell.
What is a turtle’s shell anyway?
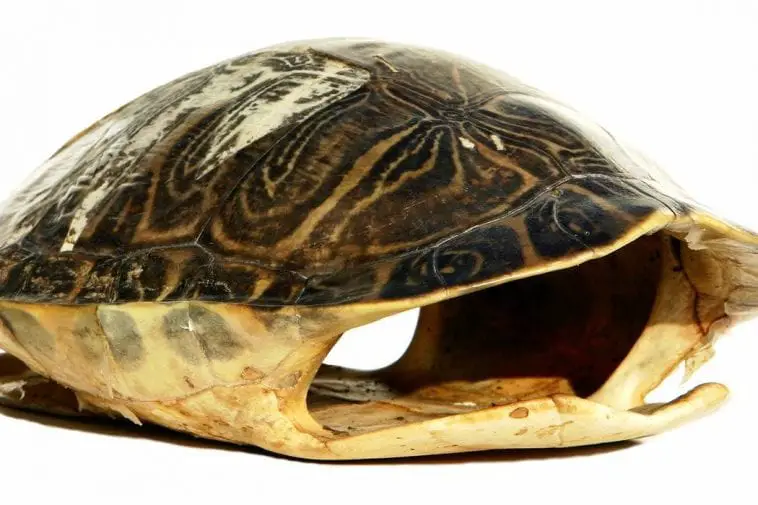
A turtle’s shell is not just a cover, but it’s a part of its skeleton. Contrary to the thought that a turtle can live outside its shell, this part of the body is composed of fused bones such as ribs, spine, and breastbone, and therefore the turtle is connected to its shell.
To understand its parts, the back is called the carapace, while the belly is the plastron. Since the shell is a part of its body, it is supplied with blood vessels and is covered with nerves. The shell plays an important role in protecting the turtle’s most important organs.
The shell has bones covered with a very thick skin and with many layers of hard keratin. Keratin is also found in our fingernails and hair. The layers of keratin are known as scutes and are shed as the turtle grows older.
As the turtle grows, new scutes are created, and these further protect the turtle shell from cuts, bruises, bumps, and scrapes. A turtle will not completely shed its shell and cannot be removed from it as well.
Common turtle shell problems
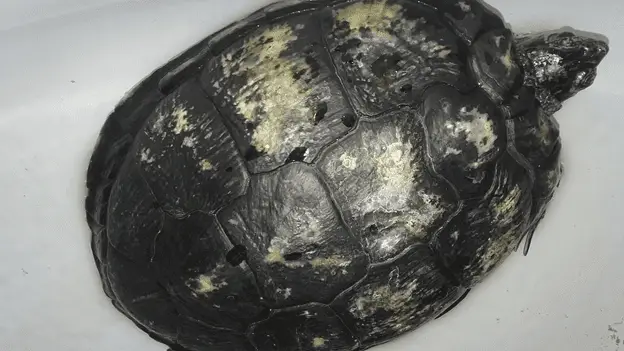
Cats and dogs have skin and hair problems, and so are turtles. The most common problem with turtle shells is shell rot, and this is caused by fungal or bacterial infections. Scutes can also grow unevenly and cause a condition called pyramiding. The shell becomes deformed and thus may crack open, chip, or break just like brittle human bones.
The following are the symptoms of turtle shell problems:
Soft spots, divots, and pits
Turtles may be small, but they are nonetheless active. Pet turtles can walk and fall from a height and land on its shell suffering from pits and divots. Sometimes, the bump may not be too worrisome after the accident, but soon, it develops into a soft spot. Also, most pits and soft spots are hardly noticeable at first and can just be seen after a routine exam by a vet or as you handle your pet. If you notice any of these signs, take your pet top the vet that understands turtles at once.
Breaks and splits
Any visible split or break on the shell should be a cause of worry as well. These are usually due to accidental falls and bumps. Just like soft spots and pits, it’s often hard to tell if your turtle’s shell has splits or breaks because of its color. If you find splits and breaks on your pet’s shell, take it to the vet at once before this condition worsens.
Uneven shedding or flaking of the scutes
When the scutes shed, pieces of it fall from the ground and not as a whole like a snake’s skin. The scutes can also shed unevenly, and this can be due to different problems. Incorrect diet is one of the major reasons why scutes shed unevenly. Pet turtles that are kept in a very dry environment can also suffer from this condition. Although this is not painful for turtles, uneven shedding can lead to infection, irregular shell growth, and cracking of the shell if overlooked.
Discoloration of the shell
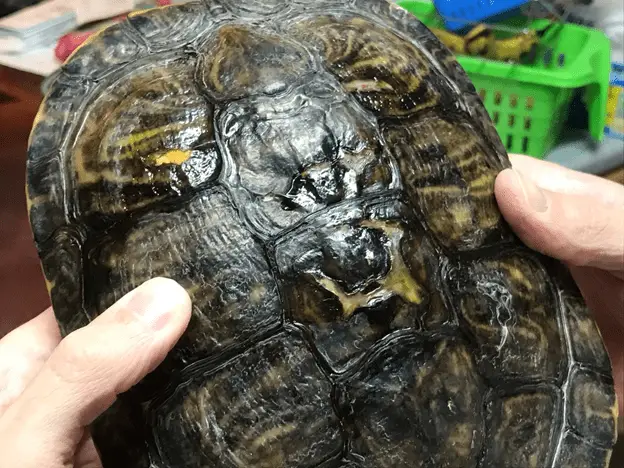
Turtle shells vary in color from the brightest yellow to the dullest green, and any irregular color or off-color like reddish color could signal shell rot. Inspect your turtle’s belly as well. If you see red areas that were not present before, then this could be early signs of shell rot.
Slime on the shell that’s not algae
A slimy coating on the shell that’s not algae can be a form of fungus that can cause terrible damage to the shell. You can see this mostly on the side and on the underside of your pet. If you see this slimy coating, wear protective gloves and try to lift your turtle and check the damage. Check the belly, tail, head, limbs, and along the edges of the shell.
Slime is created by bacteria on the shell and can develop whether your turtle is living in clean water or a dirty pond. If overlooked, this can cause future damage to the shell. Also, this happens when a turtle is not basking enough.
Algae on turtle’s shell
There are different forms of algae that grow on turtles’ shells. Algae that looks dark green and looks like fine carpet or in patches are okay. However, long and stringy algae that look slimy are not healthy algae, and this should be eliminated quickly.
Very strong odors coming from the shell or from the turtle’s skin
Properly cared for turtles have clean shells with no odor whatsoever. But if your turtle has an odor coming from the shell and the shell is cracked, slimy, or with oozing discharge from it, then this is a cause for alarm. Shell rot can lead to softening of the shell parts and strong odors as well.
Any sign of blood or discharge from a crack or break on the shell
If you frequently handle your pet turtle, then you will know slight changes like any form of blood or discharge from the shell. Blood and any type of discharge are common in conditions after an accident or a fight, in case of territorial fights or aggressive breeding or mating.
Any changes in the turtle’s behavior
Along with the mentioned signs, your turtle can also show some other changes in its behavior, indicating that there is something wrong. Check for poor appetite, lack of energy, sleeping longer than usual, and not moving at all. If you notice any of these, take your vet or to a vet clinic at once.
As you transport your pet to the vet, place it in a clean cloth or towel, taking care not to touch or add pressure to the already problematic shell. Place the turtle, towel and all, inside a box or container and keep this steady as you drive or as you commute.
How to deal with turtle shell problems
If you spot any of the signs and symptoms mentioned, don’t delay. Take your turtle to a vet or a vet that specializes in turtle shell problems to get appropriate care.
A vet can help diagnose a turtle’s shell problem by doing an initial check on your pet’s condition. He will make a physical examination of the shell and take samples of any blood, discharge, or slime found on the shell. The sample will be sent to a lab that will determine if the condition is due to bacteria or fungus on the shell.
A vet may also do imaging tests like an x-ray to determine the extent of the damage of a crack, break, or deformity. Only imaging can tell if the turtle’s internal organs were not affected by the damage or break. The vet can decide if your pet is good to go home or needs additional medical treatment and thus needs to stay in the vet clinic or hospital.
The vet will also start your pet with antibiotics if the shell problem is caused by bacteria or anti-fungal products if the condition is found to be caused by a fungus. You will be instructed on how to care for your pet at home and how to administer its medication.
The cut, break, or injury will be cleaned and dressed just like any regular wound. You will also be instructed on how to care for this wound.
A very important thing to do at home is to clean and sterilize your pet’s enclosure. A major cause of shell rot and other dangerous shell conditions in turtles is a poorly kept and dirty cage. If you keep your turtle inside an indoor enclosure, then you must clean this before you set your pet in.
- Wear protective clothing like gloves, goggles, and an apron before touching the tank or any of its components.
- Remove all the tank accessories, bedding, any water, and lighting. Set all these aside to clean individually.
- If you’re using a glass tank, use dishwashing soap and hot water to clean it. Use a brush or a sponge to scrub away. Rinse the tank with warm water and dry it out with paper towels. If you can lift the tank, take it under the sun to dry
- As your tank is drying, take care of each accessory. If your tank has water, then it must have a filter. Check if the filter is working and address issues of improperly working tank filters. As much as possible, get a stronger, larger filter and change the filter tubing. It is possible for bad algae to grow inside this filter tubing so you can’t reuse it.
For small furniture like basking rocks, tree trunks, and pots, use a toothbrush or a small brush to clean these individually. Make sure that every inch is clean. Discard the old bedding and replace this with a new one. You can place these items out under the sun to dry these well.
Also, if you have a water feature inside the tank like a dish of water or a small vat of water, replace this regularly. As you replace the water, clean the dish, or vat thoroughly.
Recovery from shell problems
When treated early, your pet will be able to overcome different turtle shell problems, even shell rot. As long as you follow your vet’s advice and care for your turtle’s health in the correct manner, then there’s no reason to worry.
As much as possible, place your pet under quarantine, especially when it is still receiving treatment. Bacterial and fungal conditions may be passed on to other turtles inside the enclosure (if your pet shares the enclosure with other turtles or other pets), and having an infestation is the last thing you want to happen.
Quarantining your pet will also help protect it from conditions like aggression and fighting. Take note that your pet needs to recuperate during this period. Further stress and aggression can lead to poor recovery and possible worsening of your pet’s condition.
Preventing turtle shell problems
An ounce of prevention is worth a pound of cure! You must treat shell problems before these occur with the following preventive tips:
- Create the correct habitat for your pet
There are different kinds of turtles, and each has its own preferred living condition. But no matter what condition your pet requires, you must make sure that it has adequate space to move in.
The cage or the tank must be kept in the correct temperature and proper humidity to keep your turtle’s shell healthy and your pet healthy and happy as well. Use a humidifier and a reptile lamp to provide ample heat and humidity. Also, invest in a digital thermometer and hygrometer to accurately check for temperature and humidity inside the tank.
- Avoid any kind of obstacle to prevent accidents
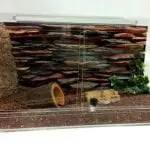
Since most shell problems are caused by accidents, you should keep an enclosure free from obstructions or anything that can cause accidents. For instance, installing a themed tank with branches and rocks that can fall on your pet; this is dangerous and impractical and can cause accidents that can affect your pet.
Keep the tank or enclosure simple and well-kempt. If you want to place a basking rock, the rock must be large and stable with no moving pieces. If you have an aquatic turtle, it’s natural to keep a water tank where your pet can swim in. But do keep a basking rock preferably a tall, even rock where it can stay to have some light. This rock must be very stable and should not move whatsoever, especially that it’s in the water.
- Keep your turtle’s living area clean, safe and sound
Inspect the turtle’s living area regularly and remove any dirty bedding, leftover food (don’t wait till the food is rotting!), and unclean water. All of these can harbor dangerous bacteria, which can cause significant damage to your pet’s shell. Clean the tank regularly and clean water and food dishes daily.
- Provide the right diet
Just like their living environments, different turtles have different nutritional needs. Do your research and find out the best kind of food for your pet. You may ask your vet about the ideal kind of food as well as supplements that you can use.
Most reptiles like lizards, snakes, and turtles require calcium supplements in their diets. If their diet is mainly fruits and vegetables, they may lack a good calcium source, and thus their bodies will pull out calcium from their bones. When this happens, bones like the turtle shell can become weak and may be affected by many conditions. To supplement your pet’s diet with calcium, provide protein-rich and calcium-rich foods as well as use calcium supplements. Use powder supplements; just sprinkle this on your pet’s food before eating. Other vitamins and mineral supplements must also be considered for proper shell health.
- Provide enough sunlight
Provide ample amounts of sunlight. If you can take your pet out of its cage or enclosure, let it bask outside. Put a wire fence or portable fence around a sunny area and just let your pet sit and bask. The fence will prevent it from moving to a dangerous area in your yard or garden and will also protect it from potential predators like dogs and cats.
But if you have an indoor pet or you can’t take it out of its enclosure, you may use a good UV light or tank light. Place a comfortable basking rock where your pet can perch and enjoy the UV lights. Ample lighting can help reduce fungus growth inside the tank and can also improve calcium absorption in the body.
- Keep your pet’s safe
Even a shortfall or a drop can injure your turtle’s shell and the rest of its body. Usually, turtles are thought of as cute pets and thus given to young children to take care of. Very young children may not be aware of how important a turtle’s shell is and may mishandle the animal. Therefore, never give a turtle as a pet for very young kids. If you have small kids at home, teach them the value of pet care and how to handle turtles.
If you have other pets like cats and dogs, they may find turtles as another pet and playmate. They may play with it actively, and this can lead to accidents that can affect your pet’s shell health. So as much as possible, never let your other pets play with your turtle.
If you want to leave it outdoors, turtle-proof the area where you’ll be leaving it. As mentioned, use a portable fence or screen to shield your pet from danger. Also, keep an outdoor and indoor cage under lock and key. Turtles, as slow as they can be, may be able to escape small cracks and crevices in its enclosure, and this can lead to possible accidents.
- Perform routine shell inspections
This is important for all pet turtle owners. Take time to check your pet’s shell as well as its skin, eyes, tail, and arms. If you see any problem or any signs and symptoms we mentioned earlier, take your pet to the vet. Look at the shell at least once a week, and after a fall or accident, monitor shell health hourly. Check for cracks, blood, oozing, and smell. Use a magnifying glass to monitor cuts slowly and take photos if necessary to monitor the result of treatments.
Turtles move slowly, and so does healing after suffering from a shell problem. A small break or cut can take months to completely heal, but you must do all you can to clean the wound regularly, dress it, and support your pet’s health all the way. Take your pet back to the vet for regular checkups. This is important, so your vet will check if the treatment he did is working, and if your pet needs changes in his medication and treatment.